Hark The Herald Angels Dangle!

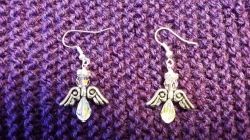
How To Make A Pair Of Pretty Angel Earrings
If ever there was a time to indulge in sparkle, glitz and glamour, then surely Christmas is it! It's also a wonderful time to indulge your crafty side; after all, we all revert a little to our childhood when Christmas comes around, and while our days of covering cards with glitter and glue may be (for some of us) long behind us there's a definite nostalgic joy in making something for the festive period. These pretty angel earrings are ideal - sparkly, simple and quick to make, and then attractive to wear once complete!
What You'll Need: Tools
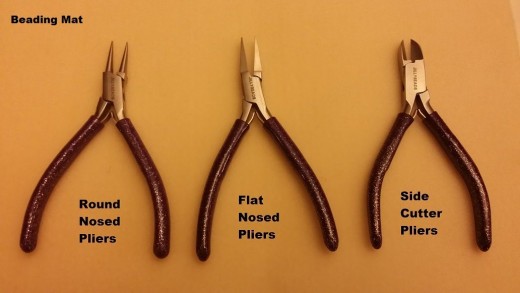
You'll need a bead mat to make sure your beads don't roll away and get lost, flat-nosed pliers and round-nosed pliers for bending the wire, and side-cutter pliers for trimming off the wire you don't need.
What You'll Need - Components
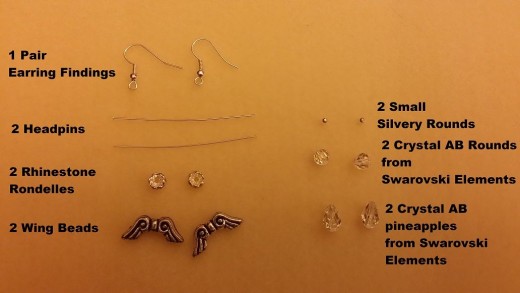
*1 pair of earring findings.
*2 headpins (these are short wires with a neat stop at the end)
*2 rhinestone rondelles
*2 wing beads
*2 small silvery rounds
*2 Swarovski Elements crystal AB pineapples
*2 Swarovski Elements crystal AB rounds
All of the components for these earrings are available as a kit from JillyBeads - you can find and purchase the components individually as well, but that will often mean buying more than you really need.
Shopping List
Step One - Thread Beads
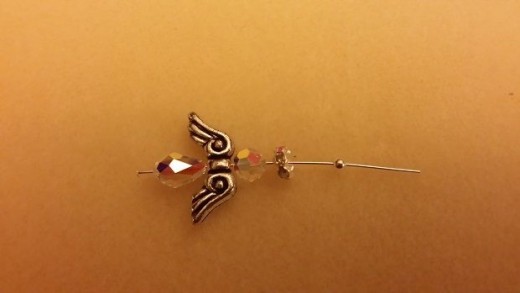
Take one of the headpins and thread the beads on in the following order:
1 crystal AB pineapple - 1 wing bead - 1 crystal AB round - 1 rhinestone rondelle - 1 small silvery round.
This is where a beading mat comes in incredibly useful - the small silvery rounds really are tiny and very fiddly, and without a beading mat it would be really easy to lose them. If your eyesight isn't perfect, a magnifying glass may also help here, as it can be hard to find the hole with such small beads!
Step Two - Bend Wire
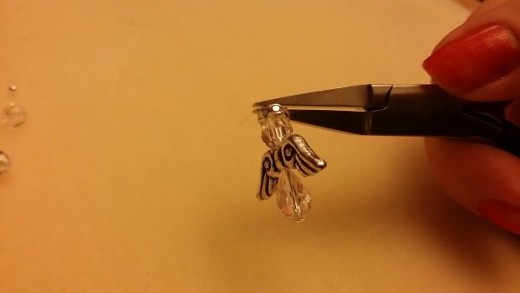
Take your flat nosed pliers and grip the wire very close to the top. Make sure that your beads are all the way down the headpin, it's easy for them to slip upwards as you're holding it and that would leave the beads loose and it won't look as neat. Bend the headpin wire down at a right angle.
Step Three - Twist Wire
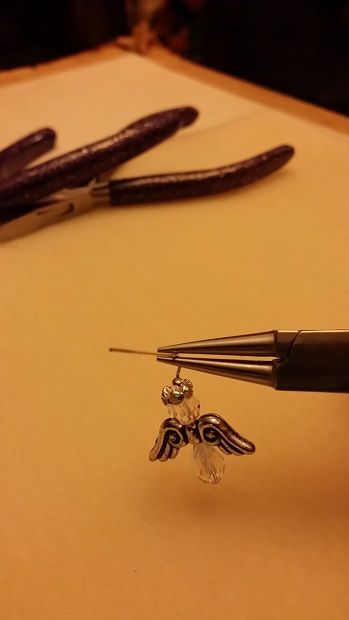
Switch to the round nosed pliers.
Grip the wire in about the same place and turn it around on itself to start forming a loop.
Step Four - Add Earwire

Important!
Stop before you close the loop and slide on the earwire, otherwise you won't have earrings!
Step Five - Complete Loop
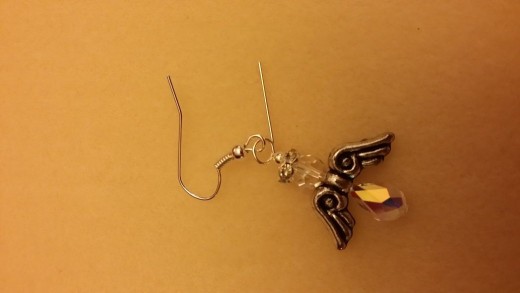
Finish making the loop with the round nosed pliers.
Step Six - Trim Wire
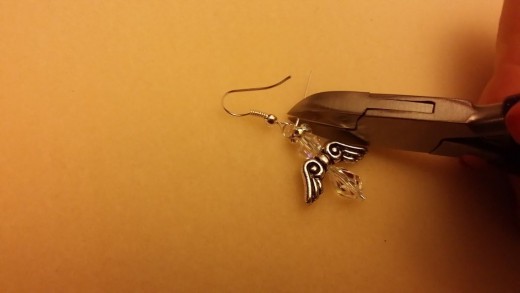
Trim off the excess wire with the side-cutter pliers. Be very careful with this step - and remember, if you leave too much wire you can use the round nosed pliers to twist it back into the loop and make it look neater.
(You can see in the picture I have actually cut a bit too far out on this one myself - this is what you get for trying to make earrings with one hand and take pictures of the process with the other!)
Step Seven - Make The Other Earring
You've now completed one earring - you just have to do the same again for the other one!
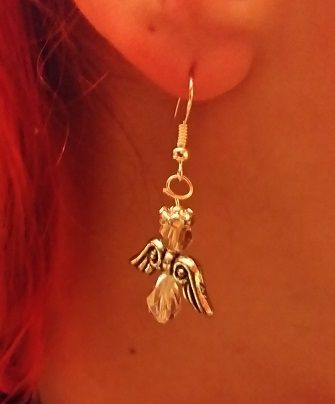
Step Eight - Wear & Be Wonderful
Ta-da! You've now completed your pretty angel earrings, so all that's left to do is to wear them, sparkle and be wonderful!
The same basic steps can be made to create any number of beautiful earrings, so if the beading bug has caught you, there may just be time to add some more beads, kits and tools to your Christmas wish list!
Alternatively, of course, these earrings are so pretty and easy that they'll make excellent presents or stocking fillers, and you can use the same idea and methods to create your own designs.